

How To Build a DIY Chicken Coop
This past winter we decided that we should get chickens. Although, I think my husband was thinking maybe 3 or 4… I ordered 26 of them. They ended up sending 27, but sadly only 17 survived the journey. (I don’t recomend getting chicks shipped a long diistance in the winter months after that catastrophe.) However, we now have 17 happy little mamas that should start laying in the next couple of months… and they need a chicken coop to lay in!
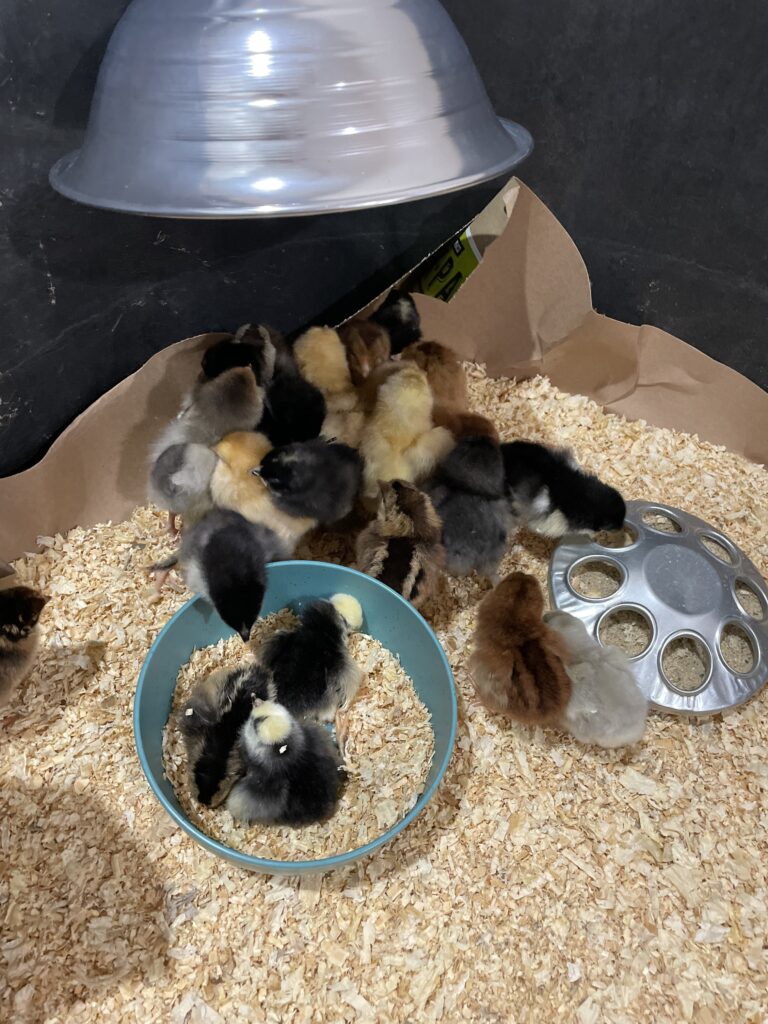
At about 8 weeks old it was getting warmer and we wanted to get them out in their coop. The catch was, they didn’t have one yet. My husband was busy with work so, I took matters into my own hands and built one myself. If I can do it, you can do it too! I should preface this by saying while I don’t have a ton of experience using power tools, I do know how to operate them safely. Make sure that you know how to operate them safely before starting – as they say SAFETY FIRST.
Step 1

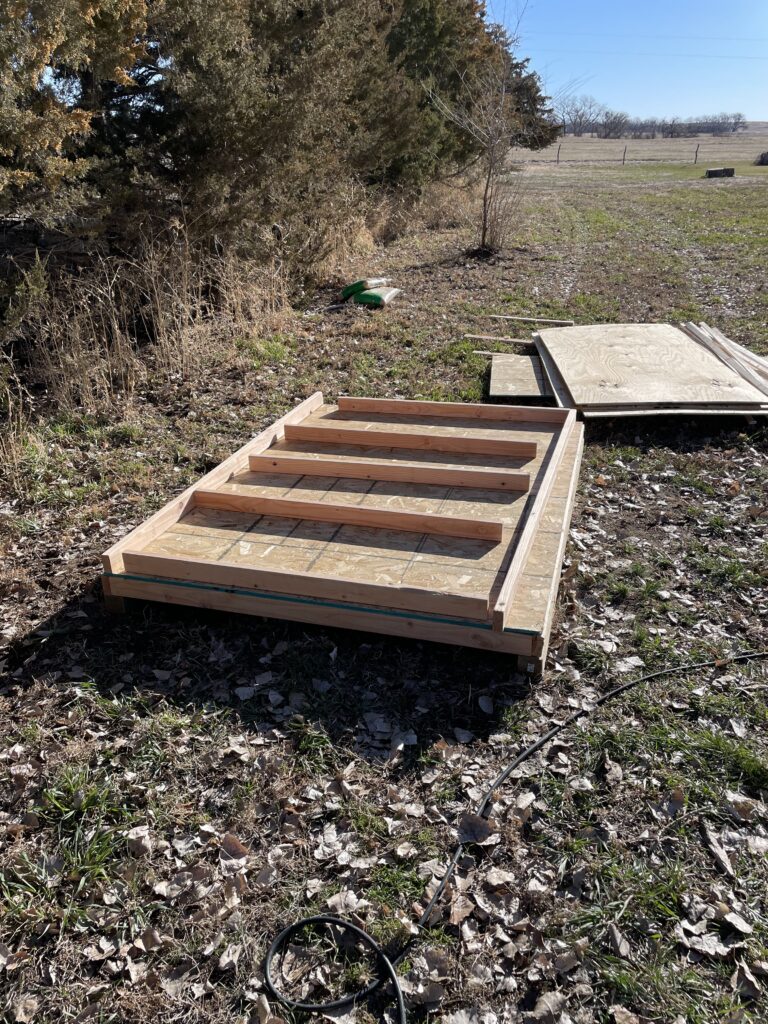
To start, I built the base. I used 2 treated 4x4x8 posts as skids and built the floor on top of that. For the floor, I used 2x4x8′ studs 24 inches on center. Then I placed the cross supports and used OSB plywood to cover it.
Step 2
After that it was time to put up the walls, I framed them out the same as I did the floor, just without the cross supports. Laying out the studs close to 2ft apart and then the top and bottom plates. I then went in and nailed the top plate to the studs at 2ft on center, following with the bottom plate. After each wall was finished I would immediately raise the walls and nailed them into place. I started with each side wall and then built the front and back.
Step 3
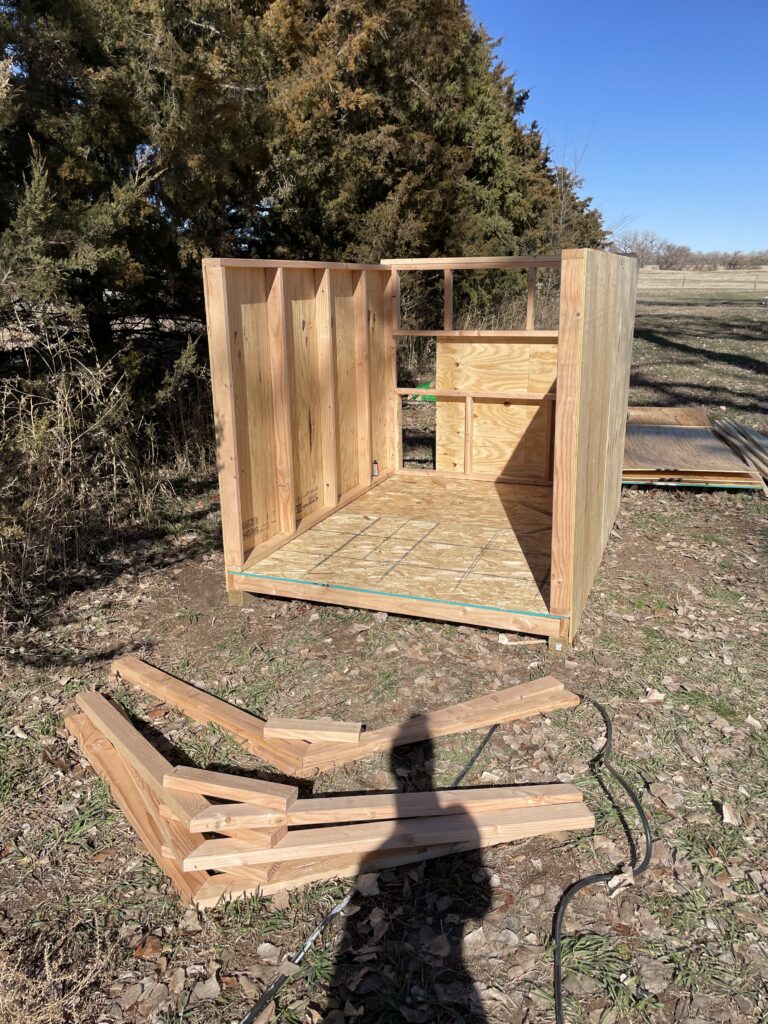
After putting up all the framed walls, I then moved on to the roof. Having never built a pitched roof before, I definitely didn’t do it the professional way, but it’s a coop and it’s sturdy. I figured out the look/pitch I wanted and created a “template” truss. Then I cut the following trusses to the exact same measurements. I attached them to the wall with the framing nailer and a few nails. They are super sturdy and do the job just fine, but they aren’t a perfect 6/12 pitch or anything like that.
Step 4
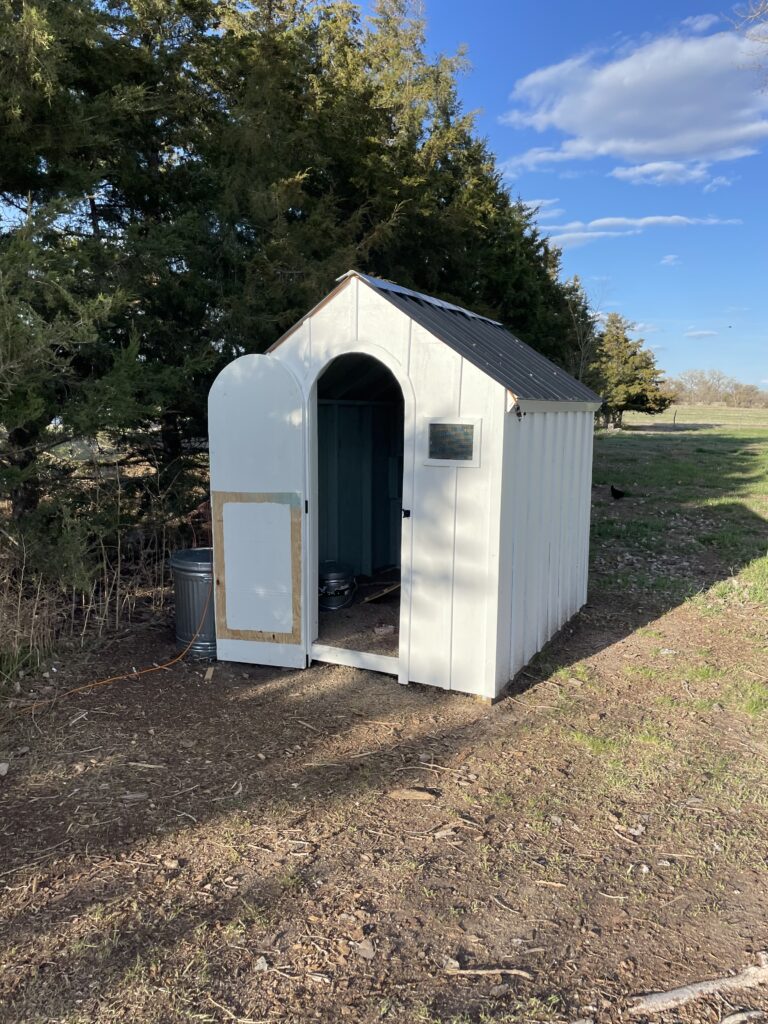
My coop is 6ft wide by 8ft long. I wanted to utilize as much of the materials that I bought as possible. I was originally going to build it 8×8 since that is what lumber is typically cut to. However, that actually would have ended up making me need quite a bit more materials so I opted for 6ft wide instead so I didnt have the extra cost and waste of the roofing material. Plus, it also makes the shape of the coop more the esthetically pleasing which is a bonus.

Step 5
Finally, I added the end walls, screwed on the roof, added the board and batten and voila – she’s done! I wish it was that easy haha! (pro-tip – use the straightest furring strips you can find for the batten. It will save you a bunch of money and give you a rustic look, perfect for a chicken coop and wayyy cheaper than prime 1×2 boards!) I also used the cheap barn paint in white from ACE, its less than $30 a gallon and works great! Way cheaper than other exterior paint.
For the windows, I used a jig saw and cut out squares. Then I stapled little squares of metal hardware clothe on the exterior and covered the edges in 1×2 furring strips for trim!
The arched door was an absolute pain, it is what feels like a million little pieces of wood cut on an angle to make the circular shape. I definitely dont recommend doing it this way… but it is an option! If I did it again I would use a 1×6 or even better a 1×12 to cut larger pieces of curved “trim” out with a jigsaw. I think that would be a much better option.
Update
Update – Since using this chicken coop for the past 6+months, there are a few things I would like to share
If you have the space I would 10/10 recommend a chicken tractor. That way you never have to clean the coop. Here is a link to the Cotton River Farm one that we are going to build next. Stay tuned for that!
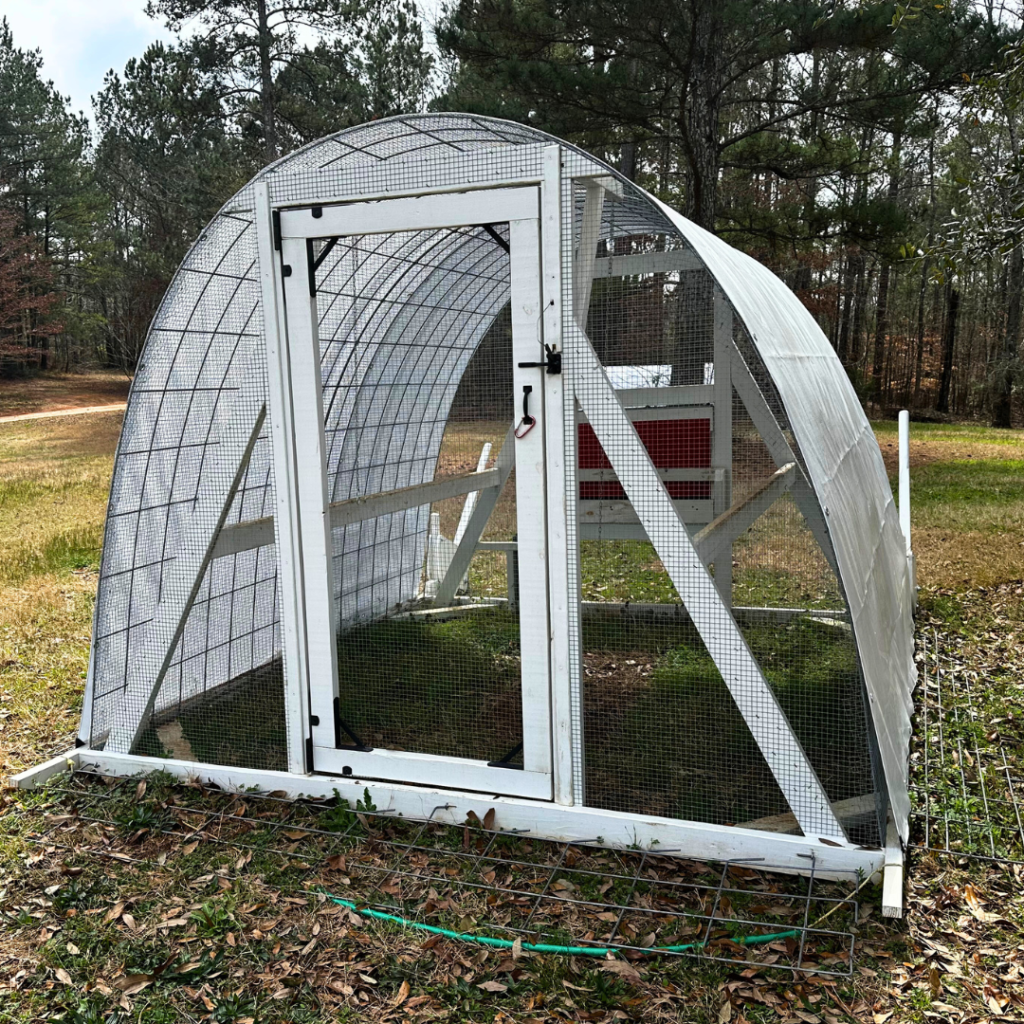
This is what their hoop house plan looks like – Cotton River Farms sell the plans to build this. Once we get ours done, I will let you know if I suggest any changes, but so far it looks like they thought of everything!
I think a chicken coop is a super cute idea before you have to clean it, even with the deep litter method or sand. I like the idea of the hoop house because if you don’t want your chickens free range all the time or can’t because of where you live. It is a great way to have the best of both worlds.
Budget
Overall, you can build a coop just like mine for anywhere between $500-1000 if you do it yourself. It just depends on the materials you choose and the size. It was a huge challenge for me to build all by myself as a “first-timer”. If I had my husbands help it would have been 10x easier and faster, but it was still doable!